Wednesday, February 29, 2012

The Wife is Away. The Hubby Must Stay....And Tackle Some Projects!

With Carla "out of the office" for nearly three weeks, I will have plenty of time to tackle some projects from our always evolving "To Do" list......There are a few projects that rate high on my list for completion while Carla is away so I thought I would share them with you can have a glimpse into what my time as a bachelor is really like.

Project 1: Master Suite Headboard
Carla picked up an excellent vintage door from Bauer Brothers a couple of weeks ago and I have been intending to turn it into our new headoard....hopefully Rocco, Sadie and I can put our paws together and make it look something like this....by the way, those tufted chairs are amazing!
Habitually Chic

Project 2: Ideas of Grandeur for Our Quaint Dining Room
In our first post of 2012 Carla hinted at the desire to have "less red" in our dining room. Inspired by a great article in This Old House (and the work my handy brother in law Brian was planning for his mudroom) I decided that our dining room needed something to set it apart from the kitchen, and given that we host quite a few dinner parties, I wanted the room to look more formal and grand. The answer (if you haven't already gathered) is Wainscoting!! I can't wait to get started on this project as I really think it will add to the classic feel created by our living room and fireplace. Hopefully it will look something like this soon.
This Old House


Project 3: Kitchen Flooring Refresher
While I have no intentions to demo all of the tiling in our kitchen and back entry, I do want to make an update to "clean up" the look.....long term. I hate to say it but, white grout in a high traffic area (and with two pups that can't seem to remember to wipe their paws) was just a bad idea. I have tried multiple sealents and still have to resort to monthly two hour sessions of bleach scrubbing. I will stand for this no longer! While I was at the Home Depot scoping out some project essentials I came across a few grout removal tools and a new darker color grout that I couldn't be happier about.....
With just a little imagination, those tired (not so) white grout lines can become so much more!......Sorry, I'm nowhere near as good with PhotoShop as my globetrotting wife! 


So what do you think - Can I pull off these three projects while Carla's out of town?
Do you like the ideas I have thus far?

Be sure to stay tuned for my progress updates along the way.....It'll be an exciting couple of weeks! Who knows, I might have a special surprise project up my sleeve too :-)

Monday, February 27, 2012

Guest Blogger: Kara's "Collected" Nursery

Ready for our first ever guest blogger?!?  I hope so because you are going to love her post!  Meet Kara (along with husband Zach), she is an insanely creative and crafty girl. 
Amber Engfer Photography
As you can see from their "Bump" session photos, they were anticipating the arrival of their first baby which meant nursery decorating!  Kara shared a few of the photos and I was so smitten with their creation that I begged her to share it!  Get ready, you will be smitten too!  Take it away Kara....

*****************************************
Hello Hammers and High Heels readers! My name is Kara and I am excited to be guest posting here today.  The lovely and talented Carla asked if I could share the nursery that my husband Zach and I created for our 1 month old daughter, Odella Delphine. When I found out that I was pregnant, I was really excited to have a reason to completely design a room! Throughout the process, we tried to incorporate furniture that we already had and DIY anything that we could to save $$$. We love vintage shopping, flea markets, and thrifting excursions so I think that the nursery has a "collected" feel. Here is where we started:
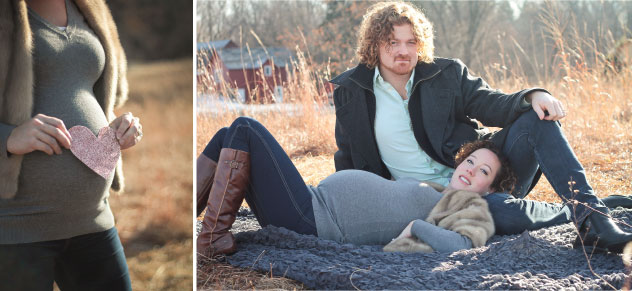
I made this color study...I knew that I wanted it to be girly, but not too pink. We already had a green lounge chair and a turquoise rocking chair that we wanted to use. I built in shades of coral and metallic accents. {love those tiny gold shoes!} All original images can be found on my pinterest boards.

The room is long, skinny, and tiny. We painted the walls the palest shade of coral blush- it has the prettiest rosy glow when the sun shines in! The fluffy white rug is from Target.
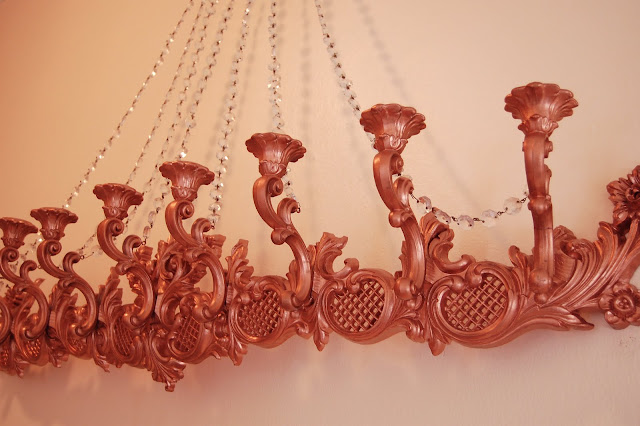
Hanging above the crib is a piece that Zach scored from a coworker's garage and spray painted rose gold {originally a brassy gold-tone} - I love all the chandelier crystals that drape down- they look really pretty in the morning sun and cast rainbows around the room!

We loved the vintage look of the Jenny Lind crib. It's a popular crib in the blog world, but really is a great value for the look-only about $150! I made the colorful pillows and plan on making a crib skirt sometime soon. I also made the quilt during my last few weeks of pregnancy- it was my first quilt! I was inspired by this quilt project- a great "cheater" quilt for non-experienced quilters! Cute felt bird mobile was a gift from my cousin!
I knew that we wanted to start an art collection for our little girl, and we have so many creative friends that it came together easily! I hope to continue to build the collection as Odella gets older and love that most of the prints would look great in the rest of our house if we want to rotate them. Special thanks to Allison Black, Emily Hendley, and 3 Fish Studio {a print studio based in San Francisco that was kind enough to let me pull the Robot print during a studio visit} for all the art wall contributions!
We found this awesome rocker at a flea market over the summer and added the sheepskin from Ikea, a sweet knitted blanket that was a gift from my cousin, and Robit the Robot, purchased from Elisa of Finch's Holiday Boutique a few years ago.
The green lounge chair is from the 1960s {and actually vibrates really loudly if you plug it in...strange} Zach found it at a yard sale when we were in college. We think that it will be great for storytime! I made the pillow and added the white furry throw from Target. Hanging above the chair is a letterpress alphabet print that I bought from a print studio connected to the Hamilton Wood Type and Printing Museum. {gotta love $10 "imperfect prints"}
The sweet round baby watercolor paintings were a gift from my great aunt- not sure how old they are, but we are thinking 1930s or 40s...pretty cute! The window covering is a cheap pull down roller blind covered with fabric. I think that it really brightens the room up and was really easy to do- I just used hot glue to stretch the fabric over the blind, but you can find a better {more permanent} DIY here.
The lamp was my grandmother's and the green frog bank was another thrift store find by Zach. {I wasn't convinced at first- the frog was a strange brick red color... Zach painted it green and now I love it! It makes me smile every time I see it!}
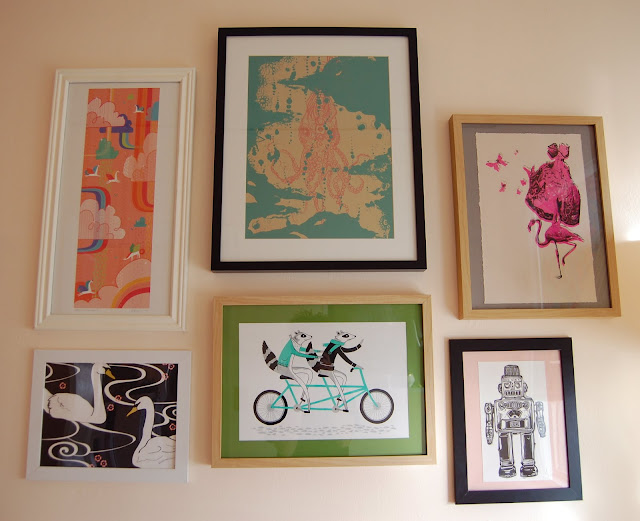
The dresser/changing table was a labor of love- we found it on Craigslist, originally white+gold, with stickers stuck to it, and broken drawers. Zach fixed the drawers and we re-painted it a sunny coral color! We need a few more pieces of artwork for the wall next to the mirror...
And now, the cutest part of the nursery....introducing Miss Odella Delphine Kopp! Fantastic newborn photo by Amber Engfer Photography! For more adorable photos of our sweet baby, check out Amber's blog post. Thanks again for the opportunity to share Odella's room!!! Follow me on pinterest or check out some of my past projects on my blog.

xoxoxo kara

Friday, February 24, 2012

Abrupt Travel Annoucement: I'm Heading Around the World... Literally!

My high heels will be doing some serious globe trotting during the next couple weeks.  I'm heading to New Delhi, India and then over to China for stops in Hong Kong, Shenzhen, and Shanghai.  I will be taking a trip around the world, literally!!! Now, I realize this annoucement is sort of abrupt and out of nowhere, I guess I didn't know when to fit it in or talk about it in earlier blog posts.  Additionally I feel bad that I have to leave our Master Bedroom Project hanging for a couple weeks... boo.  But other life adventures must go on!
Yep, I photoshopped myself into a Hello Kitty cartoon airplane to illustrate the idea
The purpose of the trip is for work, I took my first overseas work trip last year to Shanghai and I feel just like I did then- Thankful for the opportunity professionally, but more than THRILLED personally!  I believe getting to travel and see the world is something that is very important to experience in life. The only downside is that I have to leave my handy hubby and pups behind for 17 days (the longest I've had to be away, sad!).  I know that part is going to be tough, but I think Alex already came up with a surprise house project to keep him busy while I am gone :) Kind of like when he installed flooring when I was in Shanghai and when he gutted out bathroom while I was in New York.  I love those surprises! My hubby likes to stay busy, I'm a lucky little lady!

Since I am unsure if I will be able to blog during my trip I have enlisted the help of a few of blog buddies to keep Hammers and High Heels freshened up while I am away.  The hubby (aka Mr. Hammers and High Heels) might even throw in a post or two!  But, if I do get a chance to share a few photos or a fun story along the way I will certainly try.

So, I guess I am Head Over Heels for this trip! 

Wish me luck and safe travels :)
I hope to see you back here for the Guest Bloggers and to share Alex's surprise house project!

Goodbye for now
~Carla

Tuesday, February 21, 2012

The Young Swedes Get an Old American Makeover

Just in case you're confused, we're talking about our Ikea Dresser & Nightstand getting a new look :) Little by little, we are getting through all those little to-do's for our Master Bedroom.  Each small touch will help pull the room's look together and this simple update certainly helped!

Remember those antique cabinet knobs I picked up at Guilded Salvage? Well they certainly did the trick to sort of "un-Ikea-fy" our Ikea Hemnes Nightstand and Dresser.  We wanted them to both look a bit more ornate/ glamorous, sort of this kind of feel versus standard Ikea...
 Here is a look before changing out the hardware on the nightstand.
And here is how it is looking now...
A touch more glamorous right?  That photo makes me really want to ditch those nightstand lamps though, totally not working with the new hardware.  Here is a closer detailed shot of the knob, just has a little circle pattern to it.
Now to the dresser.  Again the 'before'...
And now, just feels a bit more special.
As I mentioned in that last post, I had to dig through a bin of random antique knobs in hopes of finding 14 that were the exact same.  Sadly, the most I could get was 12, but that worked for the dresser.  So that is why the nightstand had different knobs (but still the same finish).  Here is a closer detailed look at the knobs I put on the dresser.  They have just a touch of distressing on the metal surface, just the perfect bit of patina to make it special!
Additionally since we are talking gold finishes & accents for our room, I am thinking of adding in that oval antique framed mirror I picked up at a thrift store for $7.00.  It would be perfect right?
I also picked up some dark camel/ gold and navy velvet pillow covers!  They are looking good with our curtain fabric!
It's coming together! 
We still have a lot to do, but so far everything is working out according to our Master plan....
So, I know that was just a little step but are you liking the old world touch on the 'Young Swedes'?

**********************
See you later this week!

Sunday, February 19, 2012

"G"...What a Lovely (and Mysterious) Vintage Trunk

As promised, here are some photos of the trunk we picked up at Hunt and Gather during our Valentine's Day adventure.
Everything about it was perfect for the color scheme we are going with for our Master Bedroom redo.  I loved every little detail including...
... the brown canvas (perfect with Behr's Bitter Chocolate), the gold dowels & lock, black metal edge clamps, and hardwood slats. 
 An extra little fun detail was this monogrammed "G." on each side of the trunk.  Too bad it wasn't a "Z." but the random letter is still pretty fun, makes me wonder what story this old trunk has.
Here is a look inside, it has some kind of garment holder/ organizer.  Not sure if it originally came with the trunk?
 If it did, my only clue as to where the trunk came from is this label on the garment holder that says "Thiss Luggage, Leather Goods, Minneapolis"
I tried searching the name and nothing came up. I also looked through old photos in the Hennepin Country Library's Online Special Collections Database and again, no luck.

So, the trunk's history is a mystery, but I am excited that we have a unique decor addition for our Master Bedroom redo

Hope everyone is enjoying the weekend.  We are having a very warm February day here in Minneapolis, so Alex and I are going to grab a coffee, walk along St. Anthony Main, and enjoy the sunshine!  I'll be posting some more Master Bedroom updates soon! 

Friday, February 17, 2012

Head Over Heels Friday: A Beautiful 'Junk' Filled Valentine's Day

Alright, that title probably sounded a bit strange, but my hubby certainly knows the way to my heart by including my strange 'junk' love into our Valentine's Day. I have to mention there was a lot more to our day that was super sweet and probably what you will think is too cheesy, so I left all of that stuff out. Here are the important "blog worthy" things...

Part of the mystery Valentine's date Alex planned was a visit to the Minneapolis Institute of Arts.  Which was incredibly thoughtful, as it was a gesture to help inspire my little "Creative Carla" world :)  Sure enough, I found something very inspiring... and it was made from junk.
The piece is called "Alixa and Naima", created in 2008 by Swoon. I really did feel that emotional connection to the piece partly because of the overall beauty and also that it was filled with salvaged materials (which you know is close to my heart and our home). 


The combination of materials and textures was all kinds of crazy and beautiful!
Isn't it amazing?

Another fun piece was this one made out of old shoes

Had to share... it has high heels in it!

After stopping at Salut for a late lunch, Alex continued the theme for the day with a stop at Hunt and Gather to look for some nice 'junk' for our Master Bedroom Project.  While Alex was busy eating light bulbs...
 I found this amazingly beautiful vintage trunk that was perfect for our room!
(Which I will show you more pictures of it this weekend!)

Overall, a junk filled Valentine's Day that I was Head Over Heels for!


Yes, totally weird but very fun! My hubby certainly made me feel very special on a day where love is celebrated.  I am one lucky lady! 

Have a great weekend, more Master Bedroom updates are in store!

PS- What do you think of our new blog look? I know I am loving the fresh look! Special thanks to Amber at Amber Engfer Photography for her help with the design! Amber, you are so talented and amazing, thank you!

Wednesday, February 15, 2012

Window Treatments for the Master Bedroom (Plus Sewing Steps)!

Another Master Bedroom redo to-do conquered!

After hitting my salvage stops this past weekend, I was also able to tackle sewing our window panels with the fabric I picked up at S.R. Harris.  Here's a look at one of the windows....
I know the photo is a bit dark, I still need to learn how to shoot indoors facing a light source (if you have tips please pass along!).  The panels turned out exactly as I had planned, but I have to admit I have a regret with this sewing project.  After we got them hung along the curtain rod I took one look and thought the same thing that I bet some of you are thinking.... "Should have used a drapery lining fabric, ugghhhhh!!!!"

Currently, all we have for window treatments are those crummy white plastic blinds and I am dying to totally get rid of them.  We might replace them with some other kind of shade to block light and provide privacy.  But ideally, I'd want those curtain panels to block more light in addition to a shade (you know, for sleeping in on the weekends of course). Yep, it totally stinks and I probably have to bust out my seam ripper and add in a drapery lining, booo!

In the meantime, I did take pictures while I was sewing the curtain panels so I could share the project here on the blog.  Here are the DIY sewing steps for making some basic window panels, enjoy!

First, take your measurements and cut the fabric to size (include an extra 5 inches or so if you are going to put the panel on a curtain rod). Then, lay out your fabric out for ironing and pinning. 
I did a 0.5" double turned hem on all sides of the fabric.  Basically you fold all the edges in a half inch, iron them so you have a nice crease, then fold those folded edges another half inch, iron again and pin the double turned hem you just created in place.
Here is a closer look at my hem pinned up and ready for sewing.  Make sure to fold the side hems in first and the bottom hem last.
Now for the rod pocket, fold the top part of the fabric down, iron and pin in place for sewing.
Note: I like to do all of my ironing and pinning in one big step, so if you do the same make sure you don't sew your rod pocket shut!  I sew all the hemmed edges in one step, starting at the bottom of the rod pocket and ending at the rod pocket on the other side.  Then I sew each rod pocket hem separately.

Here is a closer look at the rod pocket fold.  You can see that I pinned all the hemmed edges in place, then folded down the pocket.
After folding it down I removed the pins out and placed them back in the same spot but this time, on the outside fabric.

Then you are all done with ironing and pinning, time to hop on your sewing machine and make some window panels!

***********

While I got busy sewing, Alex took on the task of installing the drapery rods.  I picked up these rods at Marshalls for only $16.99!  Their "Compare at $30.00" sticker was totally right, everywhere else I went the decent oil rubbed bronze rods were $30 to $50.  I am pretty happy with that under $20 per window price :)
Alex successfully installed the rods and we hung up the curtains!
Like I said, I still think I need to add a drapery liner and once I get to that task I will make sure to show you how I went about doing it (and hopefully I won't destroy the curtains in the process).
Regardless of the liner issue, Alex and I are very pleased with the look of the curtains in our room. But, it is also the first time we have added curtains in our bedroom, so of course it looks amazing to us :)

What do you think?  Do we need the liner?

Hope the sewing steps are helpful too!