
I am really excited about this DIY post! If you have checked out our blog before, it is very obvious that I am obsessed with 2 things: Chalkboards (here and here) and Antique Crates. Turns out it is really hard and expensive to find 6 antique crates of around the same size for our Spare Room project. So, I decided to make my own Vintage Inspired Crates! Here is a look at the first little beauty I made yesterday!


This idea started when we failed miserably at making shelves in my new closet space. I ended up finding a new idea after I found some beautiful inspiration that I wrote a post about here.
I ordered these crates from JoAnne's, they were only $9.99 each and measure 18"Lx12"Wx9.5"H. I was so excited when I got them in the mail! I ordered 6 total, here are 3 of them.
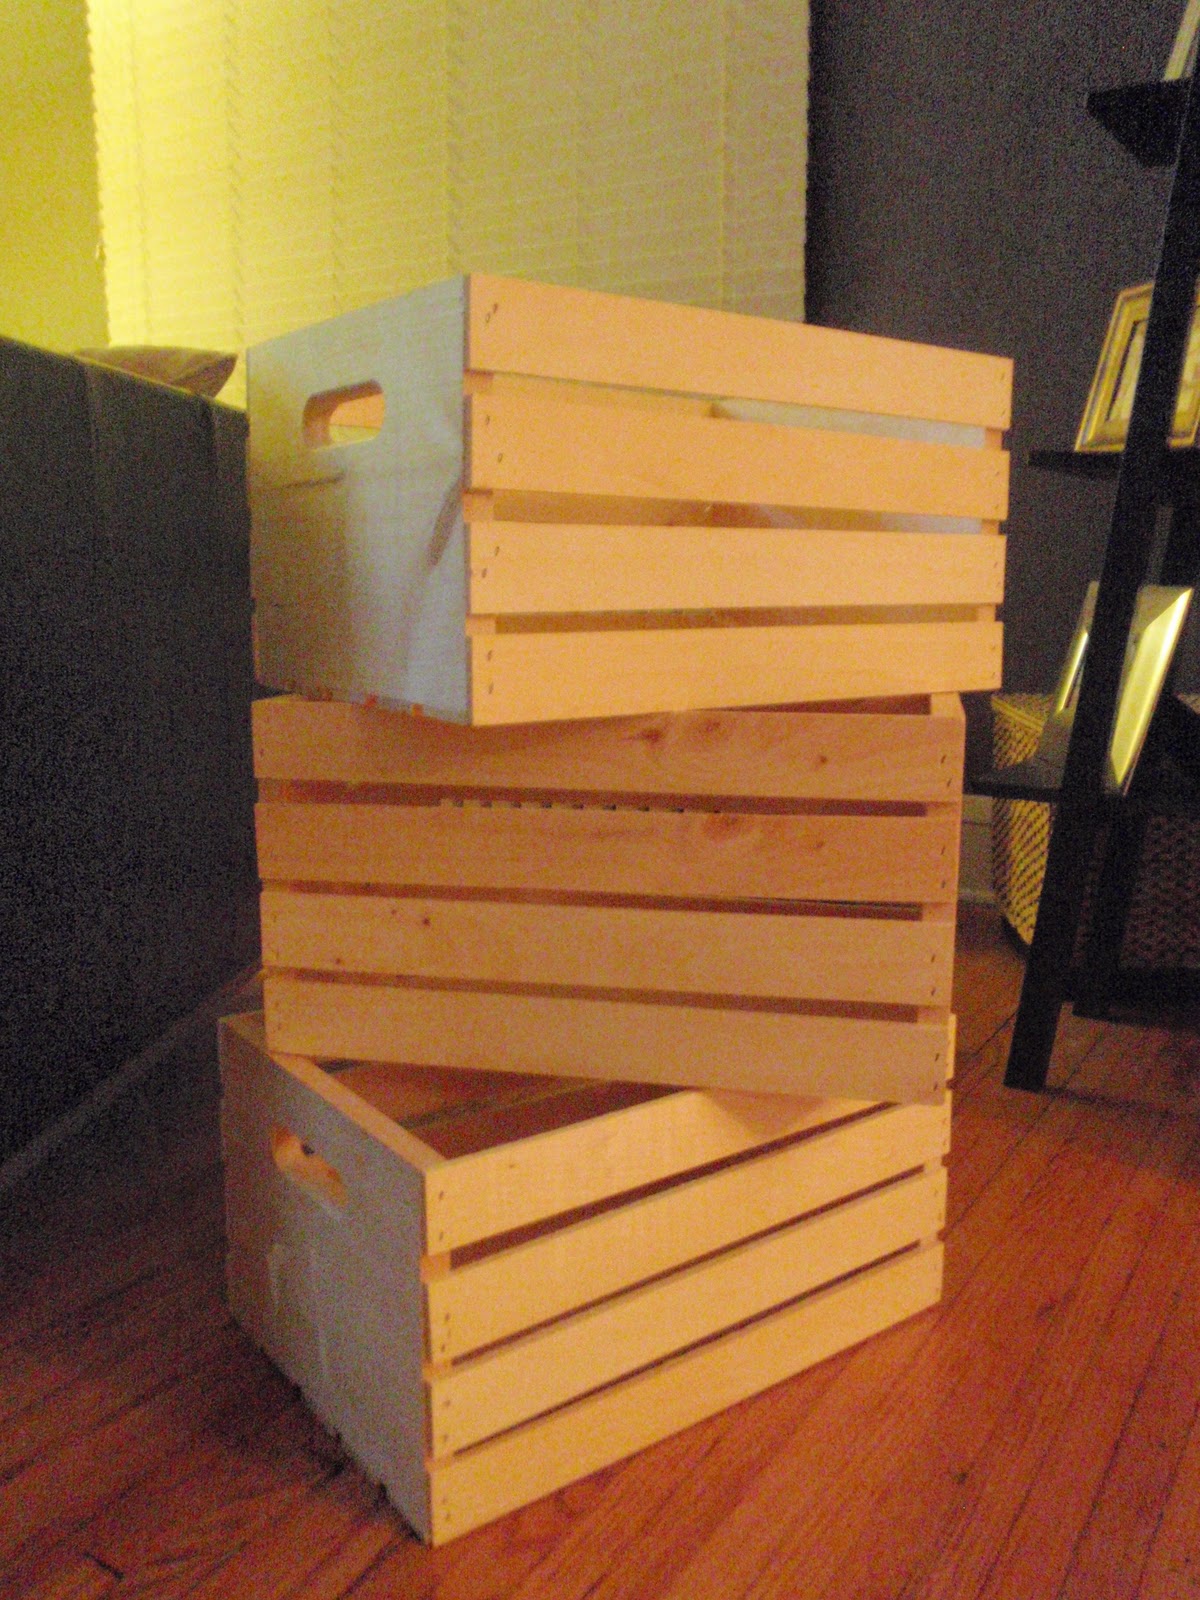
Just because I have to, here is a gratuitous Rocco photo in one of the crates- you know, to illustrate the size :)

I love the structure of these crates, but the plain unfinished look is NOT what I am going for. So we are going to take these plain crafty looking crates.....

and make them look something like this!

So Let's Get Started on the DIY Steps!
The first step was staining the wood so they would have more of an antique look (because fresh from the craft store doesn't look very chic). I used Minwax Wood Finish in Special Walnut 224. I looked at a swatch of it at Home Depot and thought that the color had a gray-ish antique shade to it AND it was only $6.69.

I used a lambswool brush to apply the stain in nice even strokes

I really liked the way the stain enhanced the wood grain detail, and made it appear more aged and unique.
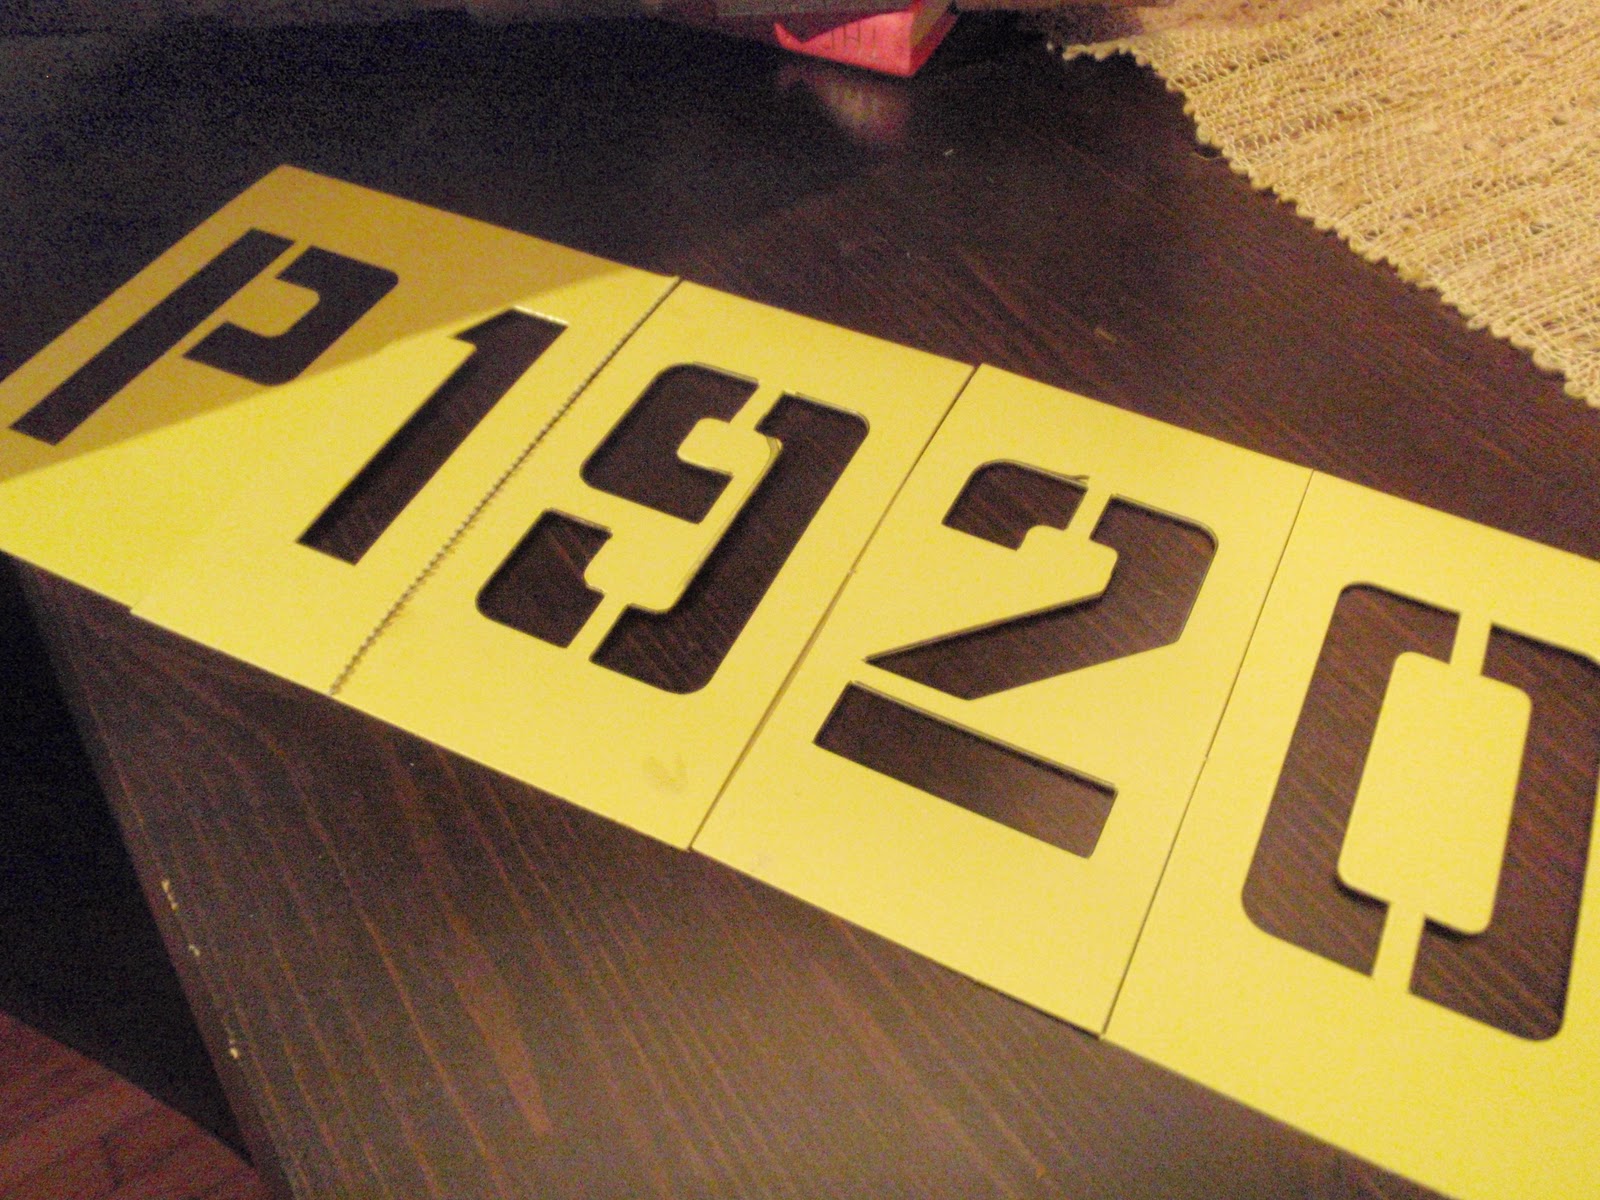
After the stain dries, it is time to add your own letters/ numbers to the crates for a more personal vintage look (similar idea to what was in my inspiration photos). I got these stencil packs at Home Depot for $1.99 each, a total steal and very industrial looking- perfect!

I wanted to use letters/ numbers that mean something to me (because I am a sucker for sentimental art and decor). For the first crate I used "P1920". The letter "P" stands for my grandma and grandpa's last name, Pierson. The "1920" is the year both of them were born. So, there's the special meaning!
I measured out where I wanted the letters/numbers to line up, then used a pencil to outline the stencils.
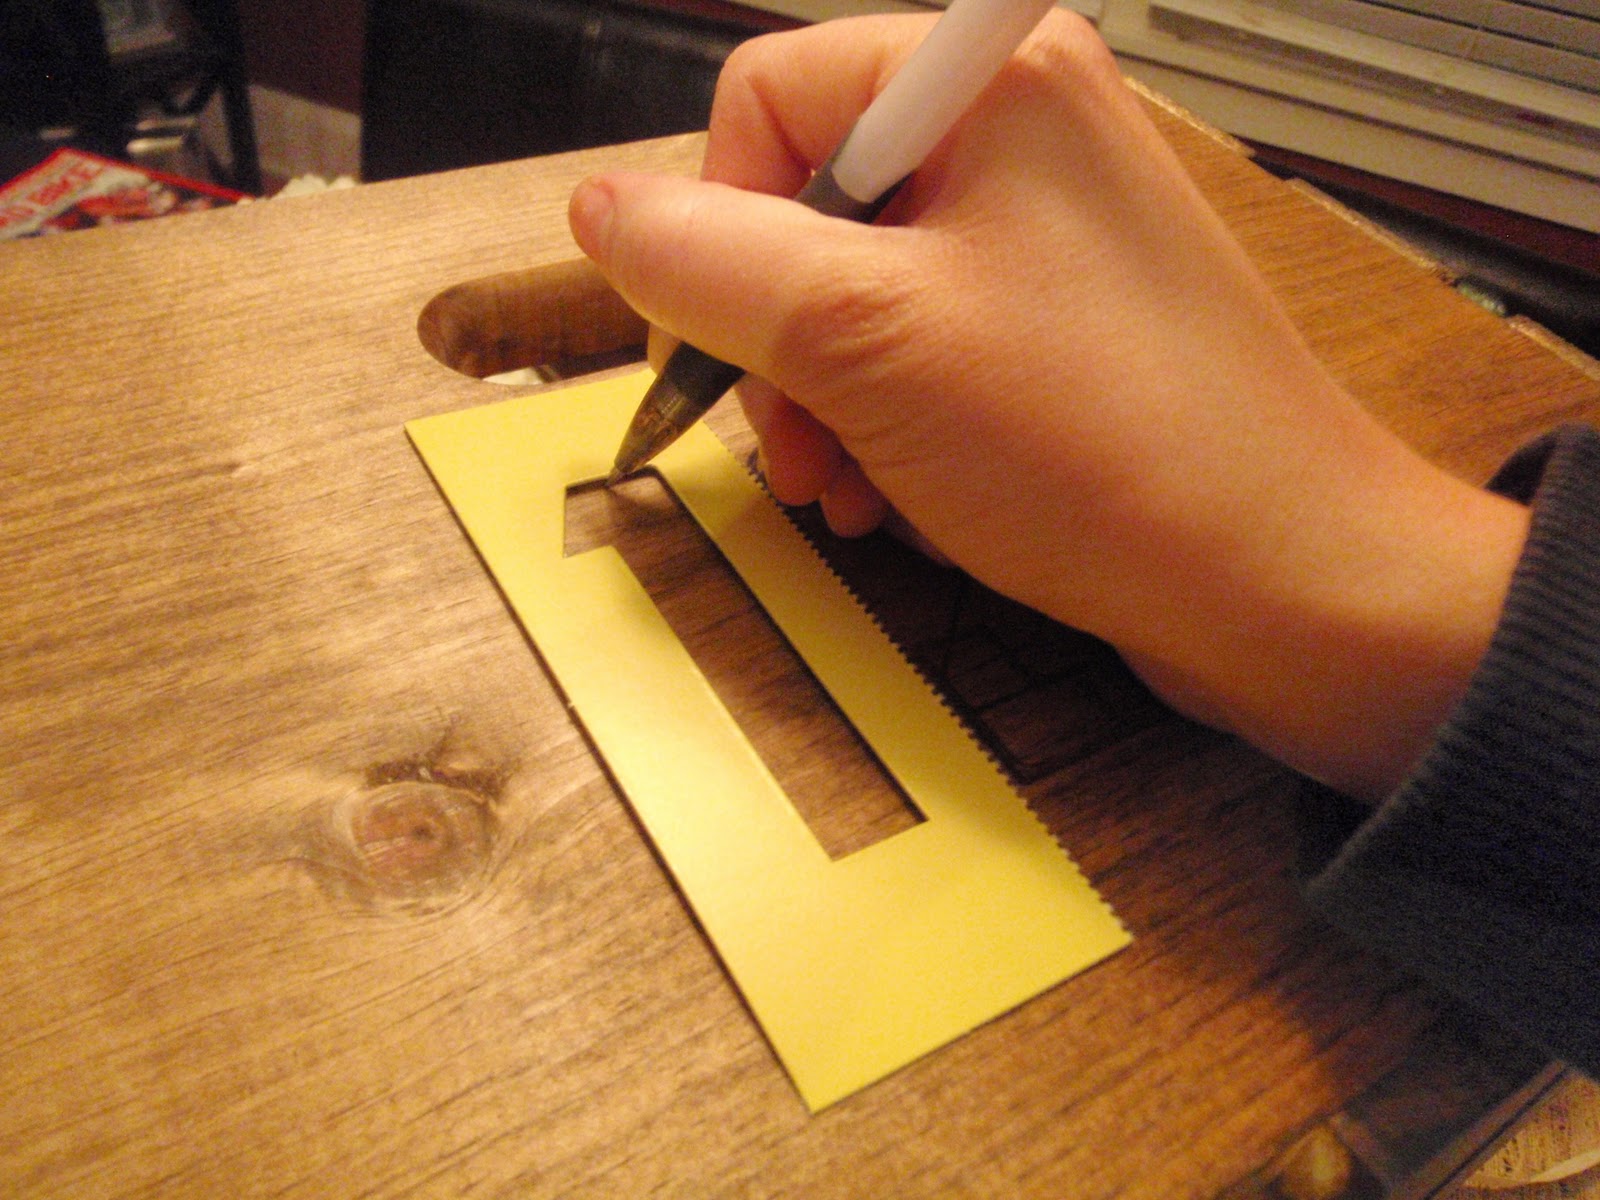
Next, I painted inside each number.

A tip for anyone that tries this, use a small tip brush. I started with something larger and it was very hard to make neat lines. So I switched to a small brush.
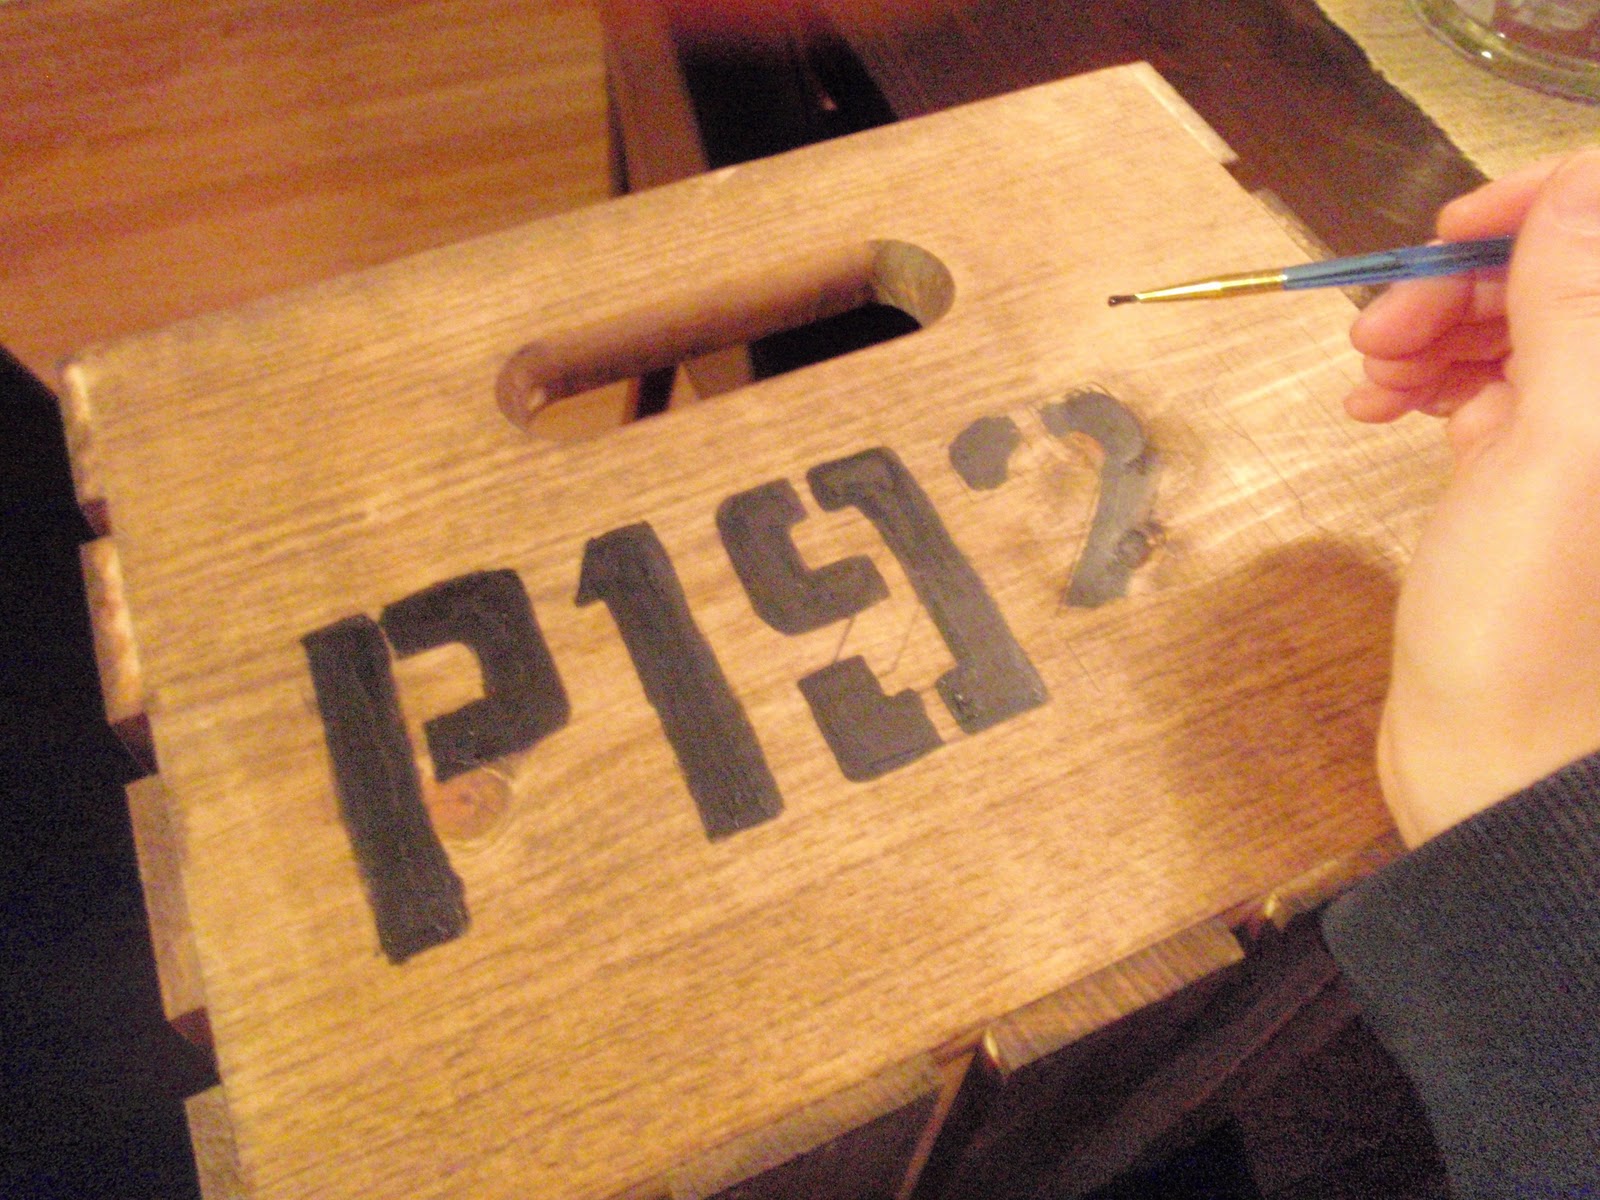

Once you're done letting it dry you'll end up with something like this! Totally cute!


I grabbed a couple of my actual vintage crates to compare the look (old vs. new)


I totally think my creation passes for a vintage look! I couldn't be happier with the end result.

Now, I just need to 'antique' 5 more, crazy I know! But I think they are going to look great once I put all 6 together to create a shelving space. I plan to use a different sentimental number/ letter combinations on each crate, but they'll maintain the same uniform look and placement. I will definitely write another post with the photos of them all together once they are finished. I hope someone out there tries this out and makes their own DIY Vintage Crates, it was really fun!
I joined up at The Lettered Cottage's How To's Day Linky Party! Link up!


That crate looks awesome! Totally vintage! Are you going to put the same letter/numbers on all of them or mix it up?
ReplyDeleteGood question, I should have added that part! No, they are all going to be different letter and number combinations I think? I will add that in, thanks Annie!
ReplyDeleteGreat idea! The stain really makes the brand new crate look vintage. I love how inexpensive this project is and it's a super way to get organized!
ReplyDeleteit looks fantastic! :) can't wait to see how you personalize the other 6 ::)
ReplyDeleteFantastic! They look amazing and you totally just inspired me! I was stumped on what to replace my ugly pink storage bins in the dressing room with! Something along these lines would go amazing with my new mirror! LOVE LOVE LOVE! Great job.
ReplyDeleteOh and have you though about spray painting the letters? you would mess up you stencils but it could add more to the aged look of things!
Ooooo, yes, spray painting would have been easier, I did that with my chair covers. I guess I worried about the paint running or showing up in an area that I couldn't cover? I might try it on the other crates, it really might turn out better, we'll see! Thanks Jenny!
ReplyDeleteMaybe use a little (tiny itsy bitty but) of spray adhesive to attach the stencil before spraying... that could help with bleeding.
ReplyDeleteOr dry brushing over the stencil would be easy, and effective!
Hey lovely,
ReplyDeleteI think they turned out gorgeously. I rather like the very teeny tiny imperfections that painting in the numbers brings. It adds to the rustic look, I think.
They look so great - well done, you!
Sarahx
LOVE LOVE LOVE!!! Vintage crates can be really expensive and I think you re-created the look beautifully! Linked up on our diy project list at {aka}|design.
ReplyDeleteShannon
I absolutely love these - it turned out fabulous! Can't wait to see the whole room come together :)
ReplyDeleteP.S. I'm your newest follower!
Fabulously vintage!!!! LUV them! You did an awesome job on making them look old! Thanks for the tips! :)
ReplyDeletexoxo laurie
Great job! I just wrote a post on repurposing objects for shelves - one grouping was old crates. It will go up Sunday night for Met Monday.
ReplyDeleteDropping by from How To's Day. Hope you'll come see DD2's picture wall we did for her.
Allison
Atticmag
Gorgeous! This is definitely something I'd LOVE to have in my home! Can't wait to see the finished project! ;)
ReplyDeleteRoeshel
I love your vintage inspired crate! The finish is perfect!
ReplyDeleteYour crate looks absolutely brilliant and totally vintage! Brilliant bit of creativity :)
ReplyDeleteMeera xx
Oh my goodness those look fabulous! I will have to bookmark this page for future use!
ReplyDeleteYay! You came! Really appreciate you sharing this great crate post with us at the Creative Bloggers' Party & Hop.
ReplyDeleteThanks for the info. Got the crates online and under a free shipping deal. Trying this soon.
ReplyDelete